Learn how to find the right shop, schedule a pre-purchase inspection, what a PPI can cost, and how it can save you money on a used car.
Used Car Buying Guide
Spotting Hidden Accident Damage and Rust
Learn how to spot mismatched paint, sloppy body repairs, uneven panel gaps, hidden rust, and water damage cues during a simple walkaround before you buy a used car.

Ben Sullivan
Ben Sullivan is a former ASE-certified mechanic with over 15 years of experience inspecting, repairing, and appraising used vehicles. He contributes to Car Wise Guide to help everyday buyers navigate the used car market with confidence, armed with the knowledge to spot hidden red flags and negotiate fair prices.
Published October 18, 2026
Updated October 18, 2026
After years of inspecting used cars for people who just wanted something safe and dependable, I can tell you this: the worst accident damage and rust are rarely obvious. It is the subtle stuff. A slightly different shade of paint. A door gap that tightens up at one corner. A “clean” undercarriage that looks a little too freshly sprayed.
This tutorial is a visual-first walkaround you can do in a parking lot. No lift. No special tools. Just your eyes, your hands, and a little patience.
Before you start: make flaws easier to see
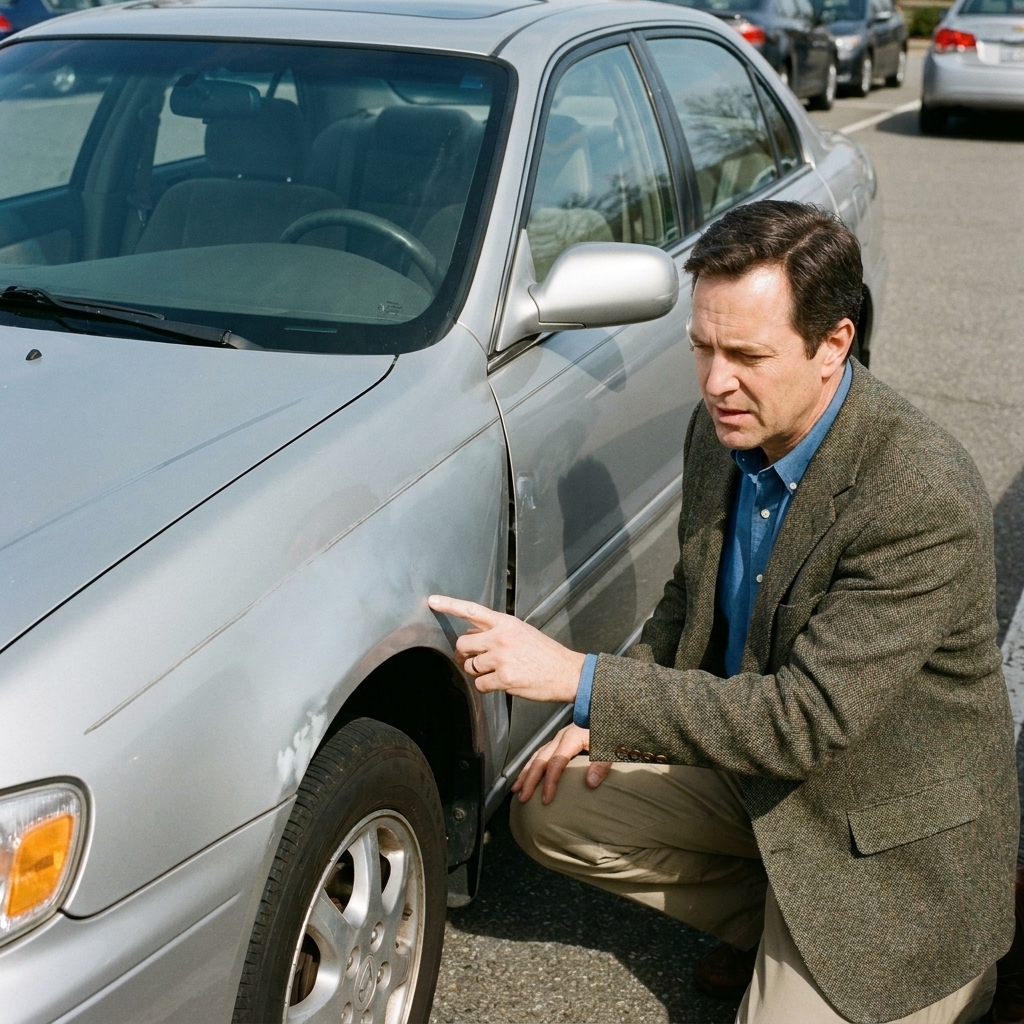
- Use natural light if possible. Midday sun can wash out ripples and sanding marks. Overcast light often makes flaws pop. Either way, walk around and change your viewing angle.
- Do not let a fresh detail rush you. A freshly polished, soaking-wet car can hide a lot. If it is dripping with tire shine everywhere, slow down and look even closer.
- Step away from harsh dealership lighting. Bright spotlights can mask paint mismatch and haze.
- Bring two simple items: a small flashlight and a clean microfiber towel. That is it.
One more tip: do your walkaround before you get emotionally attached on a test drive. If the body tells a story you do not like, you can save time.
Quick safety note: if you crouch to look underneath, stay clear of traffic, avoid soft ground, and remember exhaust and brakes can be hot if the car was just driven.
Step 1: the 20 foot scan
Stand about 15 to 20 feet back and do a slow lap around the car. Squint a little. You are looking for panels that read differently in the light.
What to watch for
- Color mismatch: one door looks “cleaner,” brighter, more metallic, or slightly yellower than the adjacent panel. (Also remember: plastic bumpers do not always match metal panels perfectly, even from the factory.)
- Texture mismatch: one panel has more orange peel, or looks flatter and glossier than the rest.
- Wavy reflections: look down the side of the car. A repaired quarter panel often shows subtle ripples.
- Odd stance: the car looks like it leans, or one wheel sits differently in the arch. That can be worn suspension, or impact-related alignment issues.
Step 2: panel gaps and alignment
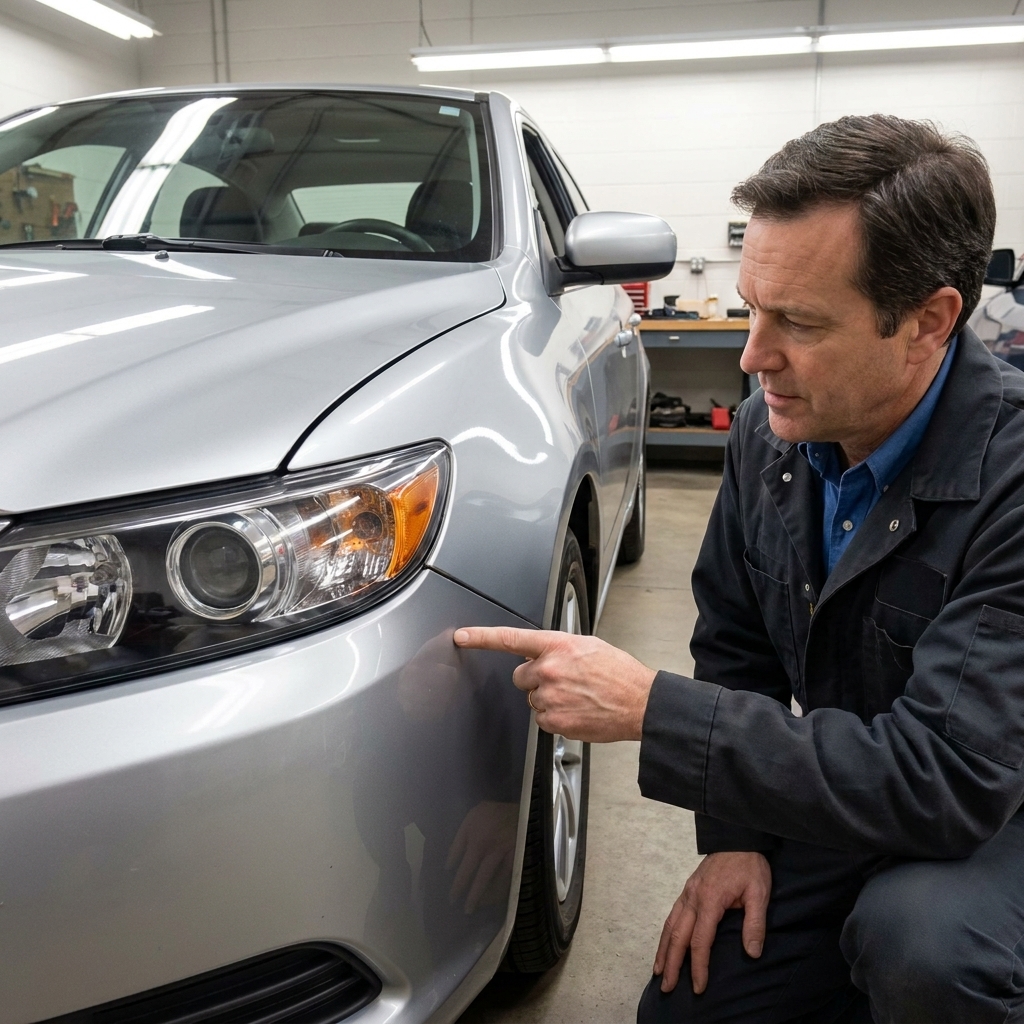
Panel gaps should be boring. Consistent gap width, even spacing, and clean alignment where body lines meet.
Where I look first
- Hood to fenders: gaps should match left to right. A hood sitting high on one corner is a common front-end hit clue.
- Headlights and taillights: should sit evenly, not tilted or sunk in.
- Bumper cover seams: bumpers get replaced often. That is not automatically bad, but sloppy fit can point to rushed repairs, broken brackets, or deeper misalignment.
- Doors: open and close each door. A door that needs a slam, drops when opened, or rubs a striker can mean hinge wear, hinge damage, or a tweaked opening.
Red flags worth a harder look
- Gap tight at one end and wide at the other on the same panel.
- One side sits proud (sticks out) compared to the matching panel on the other side.
- Body lines do not meet across panels, like a crease that is higher on the door than on the fender.
Step 3: paint and bodywork tells
Repainted panels are common. Sometimes it is just cosmetic. Sometimes it is a sign the car took a harder hit. Your job is figuring out which one you are looking at.
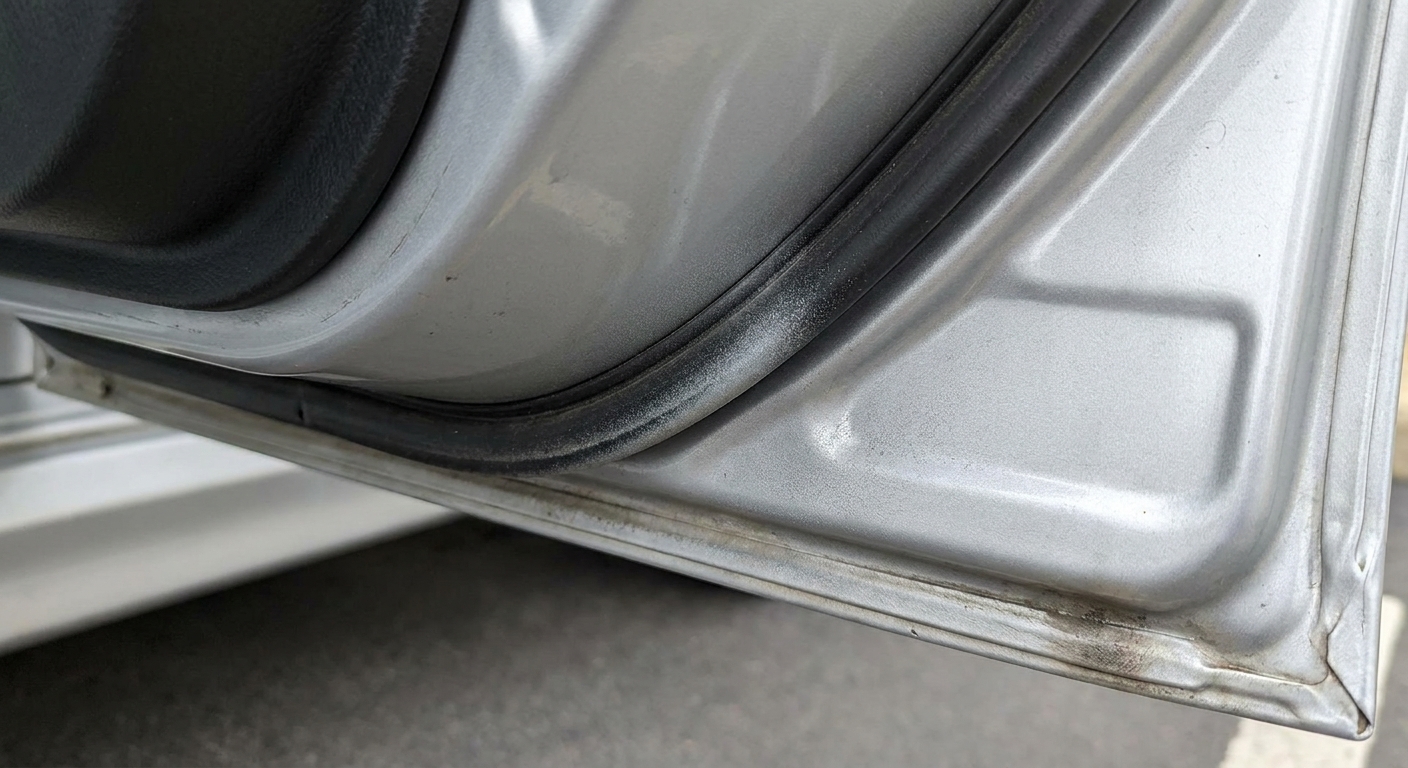
Look for overspray
Overspray is paint mist that landed where it should not. It is one of the easiest tells of quick bodywork.
- Rubber seals: check window trim, door seals, and sunroof seals for a dusty body-color haze.
- Wheel well liners: look for body color speckles on black plastic.
- Headlight and taillight edges: paint on the lens edge or sealant.
- Bolts and brackets: painted-over fasteners inside the hood opening.
Check jambs and under the hood
Factory paint coverage is usually consistent in the jambs, with clean edges and no rough tape lines.
- Tape lines: run your fingertip along the edge in a door jamb. A sharp ridge can mean masking and repaint.
- Different shade in the jamb: a panel painted on the car might not match the inside edges well.
- Missing labels: many cars have VIN or parts labels on doors and other panels, but it varies by make and model. A missing or damaged label can mean the panel was replaced or repainted, or it can be normal for that vehicle. Treat it as a question to ask, not a verdict.
Look for sanding scratches and texture changes
In angled light, repaired paint can show:
- Fine sanding marks under the clear coat.
- Cloudy clear coat or haze.
- Different orange peel compared to adjacent panels.
If you want a next-level check, a paint depth gauge can be helpful, but it is not required for this walkaround. For most buyers, the simple visual clues above catch the majority of quick resprays and panel replacements.
Step 4: the fastener audit
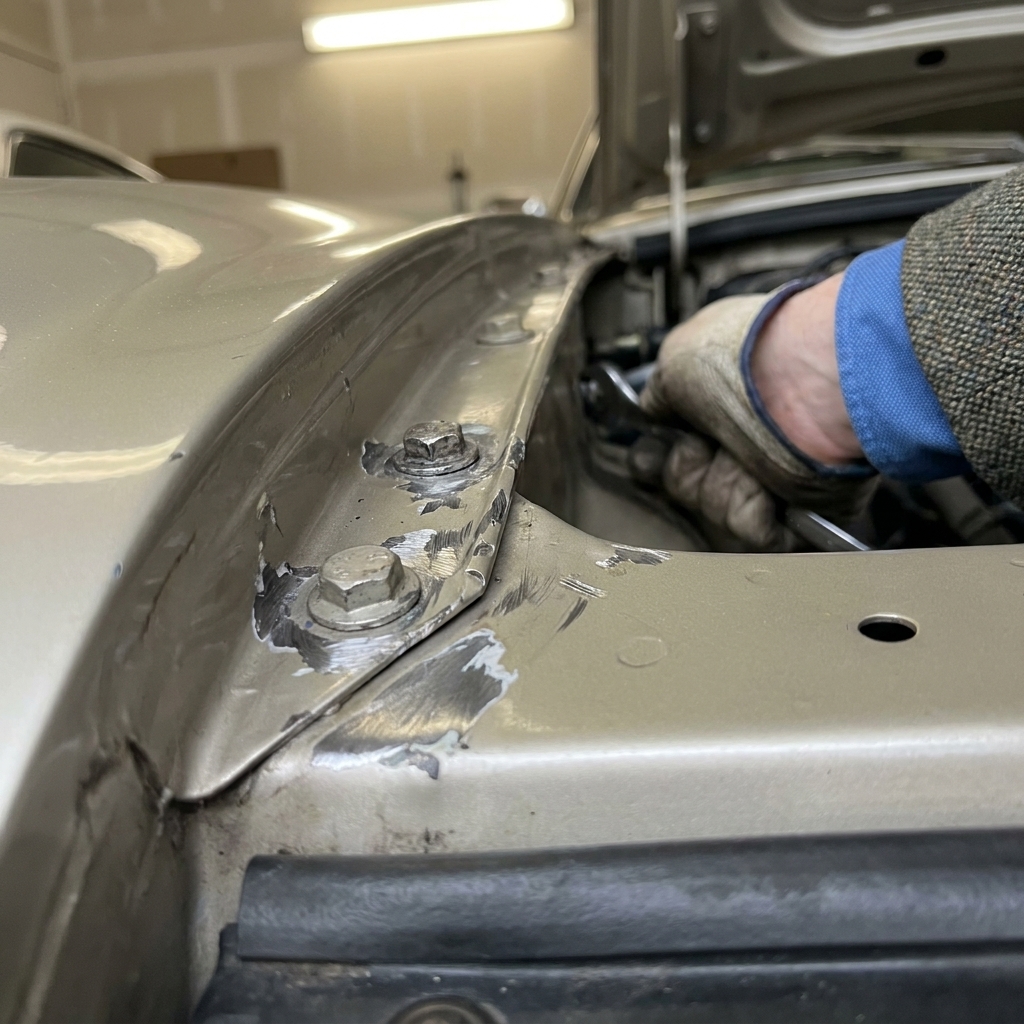
Here is a trick we used constantly during pre-purchase inspections: look at the bolts that hold major panels on.
Under the hood
- Fender bolts: open the hood and look along the tops of the fenders. Factory bolts usually have consistent paint and clean edges. Tool marks or chipped paint around bolt heads can suggest the fender was loosened or removed.
- Hood hinge bolts: same idea. If a hood was replaced or aligned after a hit, those bolts often show scarring.
- Radiator support area: look for bent metal, wrinkled seams, or fresh black paint in one section only.
Trunk area
- Trunk hinges: tool marks or a shifted hinge outline can indicate rear impact repairs or alignment work.
- Spare tire well: lift the trunk floor and look for creases, ripples, or seam sealer that looks freshly applied or unusually thick.
Step 5: glass, lights, and dates
Cars get windshields. That alone is not alarming. But patterns matter.
- Look for etched date codes on windows. If one side glass is much newer than the other, ask why. A break-in can do it. So can a side impact.
- Moisture in headlights or taillights: can mean poor sealing after replacement, or cheap aftermarket housings after a crash.
- Different brand markings on one headlight compared to the other can indicate one was replaced.
Step 6: rust spotting on a walkaround
Rust is a money pit when it gets into structural areas. Surface rust can be manageable. The goal is separating the two with a quick, smart inspection.
Start with easy outer-body hotspots
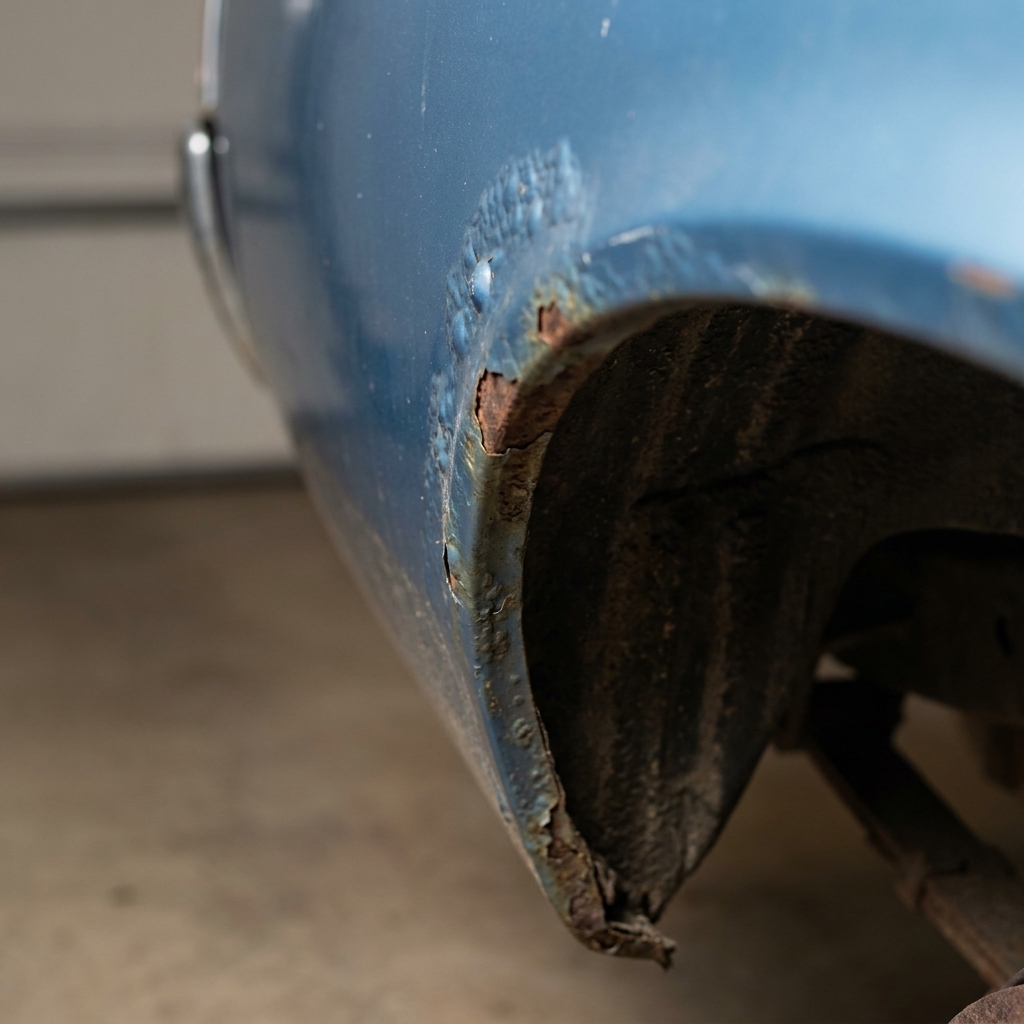
- Wheel arches: run your fingers along the inner lip. Bubbling paint, crunchy edges, or a rough seam is bad news.
- Rocker panels: look along the pinch weld seam under the doors. Ripples, fresh undercoating, or “new looking” black paint only in that zone can be concealment.
- Bottom edges of doors: open the door and check the hem flange. Rust often starts from the inside out.
- Trunk and hatch seams: especially near weatherstripping.
Then check structural rust zones
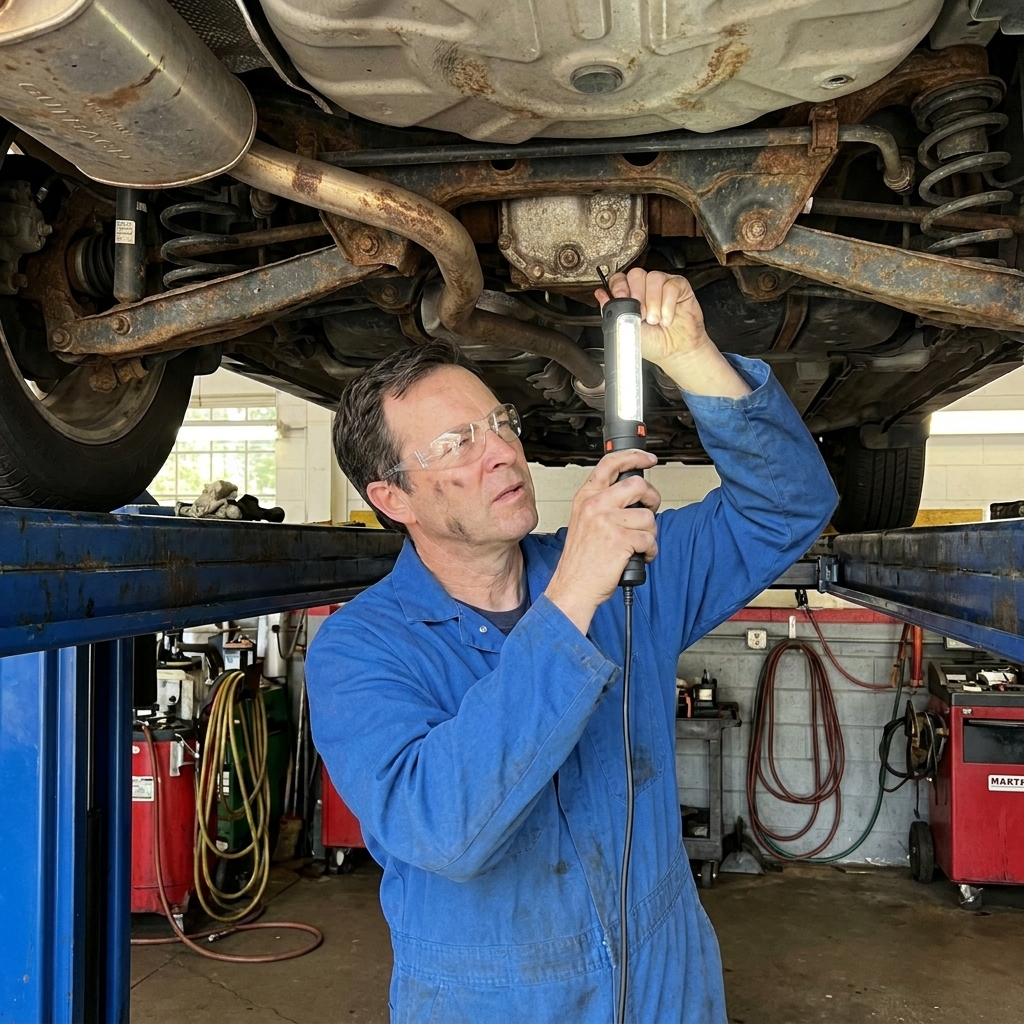
You do not need to crawl fully under the car, but you do need to use a flashlight and get your head down there.
- Front subframe and rear subframe: heavy flaking, scaling, or swollen seams are danger signs.
- Frame rails: on trucks and body-on-frame SUVs, look along the inside and outside surfaces. Focus on visual signs like flaking layers, swelling seams, and edges that look eaten away. If you are unsure, have a shop probe it safely on a lift.
- Suspension mounting points: control arm mounts, strut towers, spring perches. Rust here can become a safety issue.
- Brake and fuel lines: especially in rust belt states. Lines that look heavily crusted can turn into expensive repairs fast.
Surface rust vs structural rust
- Surface rust: light orange or brown staining on solid metal, no chunks flaking off, metal still looks smooth and defined.
- Structural rust: flaking layers, swelling at seams, metal edges that look eaten away, holes, or soft spots.
Step 7: how sellers hide rust
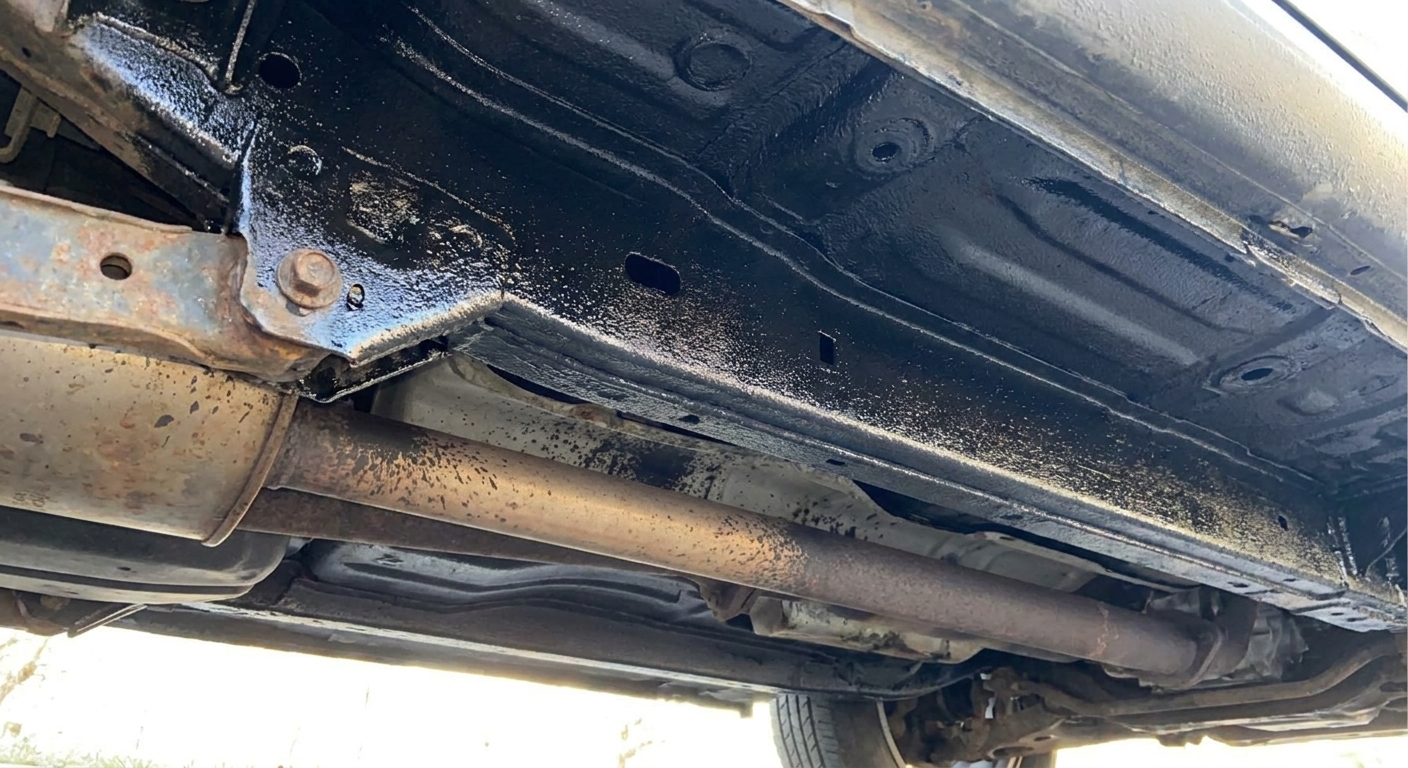
I have seen every trick in the book. The most common is a fresh undercoating or black spray paint applied right before selling.
Red flags for concealment
- New undercoat only in certain areas like rockers and rear wheel wells, while other parts look old.
- Sticky, wet, or glossy coating that smells fresh.
- Overspray on exhaust, driveline, or bolts that should not be painted.
- Texture that looks lumpy like it was sprayed over scale.
If you suspect fresh coating, ask directly: “Was this undercoated recently? Do you have a receipt and photos from before it was applied?” A good owner will not get defensive, and a good shop will often have documentation.
Step 8: bigger accident damage clues
Some damage is cosmetic. Some is the kind that can affect alignment, tire wear, airbag function, and resale value. Here are quick tells that push me toward “get a professional inspection” or “walk away.”
- Uneven tire wear combined with panel gap issues. That combo often means the story is not just paint deep.
- Steering wheel off-center on the test drive, or it pulls, and you also see front-end fitment issues.
- Airbag warning light or an SRS light that stays on. Never ignore this.
- Newer seat belts or belts that do not retract smoothly. Belts can be replaced after a crash, a recall, or simple wear. Ask why they look newer.
- Trunk smells musty or there is water in the spare well. Rear hits, worn seals, and poor repairs can all lead to leaks.
Step 9: quick flood and water damage cues
Rust and water often travel together. Even if the body looks fine, flood or chronic leak damage can turn into electrical headaches later.
- Silt or grit in the spare tire well, under trunk liners, or in tight seams that should be clean.
- Corrosion on seat rails and seat mounting bolts, especially if the carpet looks suspiciously new.
- Damp carpet padding or a heavy deodorizer smell that seems like it is covering mildew.
- Multiple foggy lights or recurring moisture in different housings can point to broader water intrusion.
Questions to ask when you find something
You do not have to accuse anyone of anything. You just need clear answers.
- “Which panels have been repainted?”
- “Do you have photos or receipts from the repair?”
- “Was any structural work done, or just bumper and bolt-on parts?”
- “Was the alignment done after the repair?” Ask to see the alignment printout if they claim yes.
- “Has it ever lived in a salt state?” If yes, focus more on brake lines, subframes, and rocker seams.
If answers are vague and the evidence is clear, trust your eyes. There are too many used cars out there to gamble on one with a sketchy backstory.
When to walk away vs when it can be fine
Usually a walk-away
- Structural rust at subframe mounts, strut towers, frame rails, or rocker structure.
- Signs of a hard front or rear hit plus poor fitment and questionable repairs.
- Fresh undercoating that looks like concealment and no documentation.
- Airbag system issues or no evidence it was repaired correctly.
Often acceptable with proof and price
- Cosmetic bumper repaint with clean fitment and no other red flags. (And again: bumpers do not always match perfectly due to plastic vs metal.)
- Replaced bolt-on panels like a fender, when gaps are good and fasteners and inner structure look straight.
- Light surface rust on non-structural parts, if the car is priced accordingly and the rest is solid.
A simple 10 minute checklist
- 20 foot scan for color and reflection waves
- Check panel gaps: hood, fenders, doors, bumpers
- Check bumpers for normal plastic-to-metal mismatch vs true mismatch
- Look for overspray on rubber and plastics
- Feel for tape lines in door jambs
- Inspect fasteners for tool marks under hood and trunk
- Look at spare tire well and trunk seams
- Check wheel arches, rockers, and door bottoms for bubbling
- Flashlight check: subframes, mounts, brake lines
- Watch for fresh undercoating overspray and wet coating
- If anything feels off, book a pre-purchase inspection
FAQ
Is mismatched paint always a bad sign?
No. It can be a repaired scratch, a replaced bumper cover, or even a normal difference between plastic and metal parts. But mismatched paint is always a sign to slow down and look for deeper clues like fastener marks, overspray, and uneven gaps.
Can I rely on a vehicle history report to catch accidents?
Use it, but do not rely on it. Not every accident gets reported, and not every repair triggers a record. Your eyes can catch what paperwork misses.
What is the single rust area you take most seriously?
Structural areas where suspension or subframes mount. If those are compromised, the car can become unsafe and very expensive to make right.
What if the seller says “it is just surface rust”?
Sometimes it is. Ask to put it on a lift or have a shop inspect it. If the seller will not allow an inspection, treat that like an answer.
My bottom line
You do not need to be a mechanic to spot most hidden accident damage and rust. You just need a repeatable process, decent light, and the confidence to ask questions. If you find multiple small red flags stacking up, do not negotiate against yourself. Either get a professional pre-purchase inspection or keep shopping. Your future self will thank you.